Newbie Tips
Author(s):
Current Version: 2.0.0 | Last Updated: June 8th, 2025
Avoid YouTube Guides
A majority of YouTube guides are often outdated, contain misinformation, and/or clickbait for views (or all of the above). Your best sources of information will come from Azur Lane Discord Servers, and/or people who actually play the game. Good Discord servers for help are Azur Lane Official, English Community Tier List, and English Community Guide Compendium.
Mail is a Bank!
When you claim Mail rewards, all Oil and Coin rewards are stored in Mail Storage. The caps are 600K Oil and 1.8M Coins respectively. Leave ALL Oil / Coins inside Mail Storage until you need it. This helps prevent your Canteen and Merchant from filling up. You can withdraw from Mail Storage as needed.
Gacha Advice
The "Build 1 ship" Daily Mission should be done on Light Construction, as you get refunded the cube back. Past that:
-
Use Cubes ONLY ON LIMITED BANNERS. You can get focus permanent ships from Wishing Well if you desperately need any.
-
Complete Requisition exactly once for its Commander Handbook mission. You are better off spending medals within the Medal Shop for guaranteed ships and other items instead.
-
Don't speedrun Permanent UR ships, even if the Commander Handbook missions incentivize it. Read the Permanent UR section. for more information.
Permanent UR Pity is a TRAP!
Main Article: UR Ships Construction
Do not pull purely for Permanent URs. Permanent pity counts toward all pools, including event banners. Chasing URs on events gives you Permanent pity "for free." Most Permanent URs powercreep faster than limited URs, so save UR Bulins for limited banners and use pity dupes to finish MLB.
Even if you do snag a typical Permanent UR, she is weak until limit-broken. Most non-MLB URs perform worse than many SRs. It's almost always better to pull on events and get Permanent URs as byproducts.
-
To farm UR Bulins, see the Common Resource Guide.
Guild Shop
See also: Early Ship Recommendations and/or Shop Priority
Every new player starts with 4000 Guild Coins. Guild Coins are easy to acquire
if you are in an active guild.
To get to the Guild Shop, click Shop → Supply → Guild.
The following ships are highly recommended for beginners:
| Ship | Location | Description |
|---|---|---|
| Guild Shop - Elite Ship | Unicorn is the best healer in the game. Retrofit as soon as possible! | |
| Guild Shop - Elite Ship | Helena is a strong damage-dealer early and her support buffs are top-tier for bosses. | |
| Guild Shop - Rare Ship | Portland is a great Vanguard tank through mid-late game. Retrofit her ASAP! | |
| Guild Shop - Rare Ship | She's your easiest accessible Battleship. |


Buy one of each rarity, then refresh Guild Shop (top right) to pick up the remaining two. You'll use these ships (except Pennsylvania ) for a long time!
Ideally have Pennsylvania as Flagship (middle slot) and Portland as Main Tank (left slot). Use your starter ship in rookie missions if needed.
Depending on when you start and/or what rate-up ships you pulled for, you might have better options than the ones listed. In that case, feel free to swap out Pennsylvania or Enterprise , but don't overinvest in high-rarity ships. SR Bulins are scarce early on.

Example starting fleet.
Other worthwhile Guild Shop purchases:
-
T3 Skill Books (Gold Rarity) - grab Offensive (Red).
-
T4 Upgrade Parts (Gold Rarity) - grab Aircraft or Main Gun.
-
T4 Tech Boxes (Gold Rarity) - grab Eagle Union since they contain the most useful equipment.
-
Royal Gourmet / Full Course - optional, nice if you have extra Guild Coins.
-
Cognitive Chips - more of a mid-late game investment.
Shop Priority
Main Article: Shop Priority
Basic Fleetbuilding
For a detailed Fleetbuilding guide, read the Fleetbuilding Guide on this website!
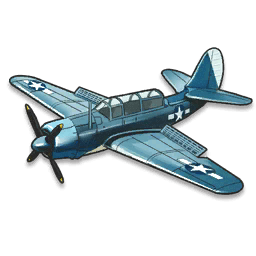
Ship Hull Types
Ship Hull types are irrelevant to determining if a ship is good or not. The Azur Lane developers have released ships of all different viabilities, shapes, and sizes in all hull types. You need to look at stats and skills to determine if a ship is good or not.
Hull Type Abbreviations
Limit Breaks
Limit Break ships you frequently use as soon as possible. Limit Breaks are massive power spikes and allow for much faster and easier progression, even with subpar equipment.
-
For Bulin locations, check the Common Resource Guide. SR (Gold Rarity) Bulins are scarce—plan carefully.
-
Do not spread Bulins across multiple ships. It's better to have one ship MLB than four ships at LB 1.
Fleet Positionings
Positions matter: some slots take more damage and affect barrage placement.
Specifically, two are critical:
-
Flagship: The middle slot in your Main Fleet (gold-colored square). Usually a BB—secondary guns help manage suicide enemies. Many BB barrages deal maximum damage only from this slot.
-
Main Tank: The leftmost slot in your Vanguard Fleet. Pick your tankiest Vanguard here, as it takes the most damage.
Faction Fleets SUCK
Running faction fleets has multiple downsides:
-
They demand far more Bulins than generic fleets, slowing progression.
-
There is no extra synergy bonus simply for using same-faction ships.
-
Few faction buffers are meaningfully good; you're usually better off running a high-quality "good" ship rather than a faction ship that relies on buffing. (Example: Bismarck vs. a standalone strong ship like Richelieu .)
Hyper-Levelling & Early Fleets
Run a single strong fleet through Chapters 1-8. Missions calling for two fleets can use a "throwaway" Fleet 2 until Chapter 9, where you start investing in a proper second fleet.
-
"Fleet Power" and "Total Stats" are just vanity numbers—ignore them; focus on matching ship composition to stage mechanics.
Submarine Fleet (Optional)
You do not need to invest in submarines early. You can clear Lv. 65 Supply Line Disruption with minimal sub investment.
Here is a Video demo by Suchiguma showing how it is done.
Retrofitting Ships
Your highest priority retrofit is Unicorn . After that, retrofit any other core ship you use daily.
Skill Upgrades
Upgrade only on ships you use. Read skills for more information; you can likely tell if a skill is useful or not based on the description. (See also: Tactical Class .)
Push Campaign
Your first major goal (besides event grinding) is to push to Chapter 9 .
-
Chapters 9 and above have an Oil-Cap , which limits your fleet's consumption. This massively improves oil efficiency.
-
Chapters 9+ also award Clearing Rewards (coins and small resources), boosting coin income.
-
A big EXP spike occurs at 11-1 .
-
On oil-cap maps, the most efficient EXP farm is X-1, and the best coin farm is X-4.
Once you hit Chapter 12 , you begin getting Cognitive Chips from Clearing Rewards. Farm Chapter 12+ if you need more Chips.
Do Not Farm 3-4
Farming for Akagi and/or Kaga at 3-4 is one of the worst early game mistakes.
-
Their drop rates are only 0.75% each; you will spend too much Oil for too little return.
-
Foxes (Akagi/Kaga) cost 8 Gold Bulins total (they need each other to achieve mediocre performance). Each alone is weaker than many Commons, unbalancing your fleet.
-
You almost always want to run Unicorn . Forcing a 3 CV fleet does not work early game due to the amount of Suicide boats present.
Any guide that says "farm Foxes" is outdated or misleading. If you really want them, progress further and farm with a 1-1 fleet (two ships total).
War Archives
Only farm War Archive stages you need for ship drops or Fleet Technology. Skip the rest until much later.
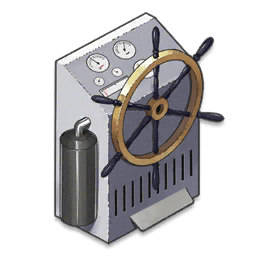
My Fleet Is Out of Ammo!
Main Article: Ammo
Your fleet can still fight with 0 Ammo; they just do reduced damage. Read the linked Wiki to understand how to manage low-ammo situations.
Early Game Equipment Tips
Avoid Farming Gear
Gear drops in Campaign maps are horrible. Do not farm Campaign maps for gear because drop rates and loot quality are poor.
-
In certain Events, gear drops can be worth farming, but Event currency always has higher priority.
Early game gear mostly comes from Tech Boxes. Always craft Tech Boxes up to at least T3 (Purple) before opening. In mid/late game, gear comes from Gear Lab and/or Operation Siren .
Gold Gear =/= Good
Rarity does not guarantee power. Many Gold (Rare) items underperform compared to Purple (T3) gear. Below are early-game T3 (Purple) Tech Box drops to look out for.
| Rarity | Description |
|---|---|
| Elite | |
| Rare |
This principle applies to UR gear as well—high rarity does not automatically mean "best." Gear is always situational. For more gear guides, see:
Gearing Is Situational
People often ask "What is BIS for X?". In Azur Lane, it's always situational. Choose gear based on stage mechanics and enemy types, not just raw numbers.
-
Every weapon has specific Ammo Modifiers. These modifiers can increase/decrease damage against certain enemies. For rough comparisons of gear stats and Ammo Modifiers, see: Equipment List .
-
Skills or fight mechanics often drive gear choice. Example: Helena 's Radar Scan debuffs enemies every 20 seconds—time your Main Fleet gear with her rather than chasing pure damage.
-
Some ships want specific gear synergies. Example: Kearsarge gains big buffs if she uses Eagle Union or Northern Parliament aircraft, so that is higher priority than plane damage alone.
-
When mobbing, spread backline damage to avoid overkill—some ships have high reload or cooldown reduction skills that let them strike first. A common mistake is giving your healer faster planes: it shifts heal timing without adding extra strikes, leading to a net loss.
Augment Modules & Gear Lab
Both systems are long-term grinds—unlock them but don't over-invest early. Main articles: Augment Modules and Gear Lab.
Upgradable Resources
The following items can be crafted to higher rarity in the Depot :
| Base Material | Crafted Material | Notes |
|---|---|---|
 Amount: x6 |  Amount: x1 | Craft as many times as needed. |
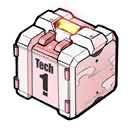 Amount: x5 | 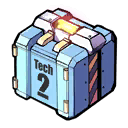 Amount: x1 | Always craft up. Never open T1/T2 Tech Boxes—only open T3 or higher. |
| Amount: x5 | 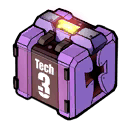 Amount: x1 | |
 Amount: x6 | Amount: x1 | Upgrading Skill Books to higher rarity reduces total EXP gain compared to using them individually. Only craft if you have an overstock you won't use. |
| Amount: x4 |  Amount: x1 | |
 Amount: x8 |  Amount: x1 | These are very scarce. Craft up only as needed. |
Grind Shipyard EXP Manually
Combat Data Packs should NOT be used to grind Shipyard EXP . Instead, spend Packs in the Prototype Shop to buy Gear Blueprints.
-
Gear from Prototype Shop can take months to get via regular drops. Using Packs can net valuable blueprints in 1-2 weeks.
-
Shipyard EXP grind manually usually takes 1-2 weeks if you're committed, even for mid-game accounts.
For full Research details, see the Research Guide.
Rerolling
It is not recommended to reroll accounts because Cube income is spread out rather than frontloaded, especially in early game.
Only consider rerolling if you start during a UR event where the UR is the rate-up ship.
Hard Mode Cheese
You can cheese a 3-star Hard Mode clear by exploiting map mechanics:
-
Kill all mobs, then kill the boss. (2 stars, 1 attempt)
-
Kill all mobs you can, then leave before killing the boss. This does not use an attempt. Repeat until you see the third star, then finish the boss or retreat. (1 star, 0 attempts)
If you don't see mobs on entering, be sure to turn Clearing Mode off.
Upcoming Events & Resources
Keep an eye on Azur Lane's official social channels (Twitter/Discord/Facebook) for announcements. Check the Events Wiki Page for a calendar.